- New Blog that is being updated is Tinker Niche
- It's here 👉 Tinker Niche: New Blog/New Stuff
Monday, August 8, 2022
Tinker Niche: The New Blog
Sunday, November 24, 2013
Funbook P300 support for Windows 8
- Install the default adt bundle from Google
- It includes the default Google adb drivers
- Device manager recognizes the P300 as an Android device but does not update the driver
- Either edit the default Google usb driver or download it and edit it.
- To recognize the Funbook, the PID:VID combination needs to be added to the android_winusb.inf file. An example configuration:
- %SingleAdbInterface% = USB_Install, USB\VID_18D1&PID_4E11
%CompositeAdbInterface% = USB_Install, USB\VID_18D1&PID_4E12&MI_01 - Can be changed to
- %SingleAdbInterface% = USB_Install, USB\VID_18D1&PID_0003
%CompositeAdbInterface% = USB_Install, USB\VID_18D1&PID_0003&MI_01 - Notice the VID:PID changed to 18d1 and 0003. This will enable WIN8 to install the driver.
- Now the USB driver for the Funbook P300 is recognised, but Win8 will not install it as it is not signed. So Windows 8 driver signing has to be disabled as given here
- Once this is done Win8 will install the driver
- Android application development IDE will now recognize and install the application on the device.
- This method should work for any of the lesser known Android tabs having a PID of 18D1.
Monday, April 15, 2013
Running Cyanogenmod 10 (JellyBean) on a Micromax Funbook(P300)
- Long time requirement to run a custom ROM on the funbook
- The funbook is rooted so no issue in upgrading stuff.
- To upgrade the image, one can use ClockWorkMod (CWM)
- Used version cwm_recovery_6.0.1.2_a10.zip
- This recovery CWM also disables requirement of a signature
- To install this on the funbook
- Unzip the file.
- Contents are these file install_recovery.sh, reboot-recovery.sh & recovery.img
- Install recovery file, copies the rescue.img to the rescue partition nandg
- Uses cat to write to the partition. dd would be better.
- Reboot-recovery, writes a string boot-recovery to the nandf partition.
- If one is stuck in this mode, where it refuses to get out of recovery mode because of this tag, one can just write a sequence of zeroes on the nandf partition and clear it and the machine will reboot normally.
- Tried various unofficial Cyanogenmod ROMS.
- Tried CM9 ie Icecream Sandwich ROM from Cyanogennmod site cm9_nightly_20120903.zip
- Need to install some compatibility modules, else touchscreen etc does not work.
- Development for CM9 did not seem very active.
- So tried the CM10.
- Follow steps from this site: http://www.slatedroid.com/topic/39064-building-cm10-for-a10-devices/.
- Download the CM10 sources from the cyanogenmod git.
- Make changes to CM10 sources to the point to Shaun2029's repository and save the file in the local_manifest directory.
- Extract the prebuilts from the Funbook and store for later use.
- run these following commands to create a ROM from CM10 directory
- source build/envsetup.sh
- Setup the environment including the toolchains etc
- lunch cm_907-userdebug
- Configure the build for the specific device.
- mka
- Generate the images
- mka otapackage
- Package them so that they can be written
- Download the kernel as noted.
- One has to enable the Assume Hacked memory A10 config option
- One has to disable DEBUG_INFO else the modules will grow too big to fit into the system partition
- The compilation of CM10 failed once and was solved by running this command
- make update-api
- The ROM is created in the out directory.
- Reboot into recovery and then install the zip from the SDcard via CWM.
- JellyBean needs a bigger system directory. Earlier install of CM9 had shrunk the default Micromax funbook /system directory from 500MB to some 265 MB.
- One also needs to install google apps(gapps) for the official supported apps like talk, playstore ,etc. This is installed via CWM in recovery mode.
- But because of the "almost full" nature of the system partition, even though CWM reported successful writing, there was not enough space to write the gapps. And google playstore would crash frequently.
- Solution is to create a bigger system partition. But this Flash file partitioning is done by the image through Livesuite.
- Idea was to get a default Momo9 image. The Funbook is a Momo9 clone from Ployer.
- Tried various 97F1 based ROMs. But all of them had very little space for the /system.
- This site talks about various options http://tabletrepublic.com/forum/iview-760tpc-ployer-momo9/iview-760tpc-k-ployer-momo9-firmware-rom-releases-1610.html. But Iview seems to have changed their webpage layout, so some of the links do not work.
- Finally an IVIEW 760TPC image from here http://www.iviewus.com/newsRead.php?id=87&catId=257 gave a 760TPC.rar which when installed via CWM gave a /system of about 300MB.
- Flashing the Gapps, even inspite of lack of "some" space, applications like playstore are working.


Wednesday, June 20, 2012
Experiments with Tiny LCD projection
 |
| Mobile phone LCD |
 |
| LED Focus Light with Driver |
 |
| Cardboard Lens Housing |
- Since a long time wanted to build a small projector like the ones on instructables.com. It seemed tougher than it actually is.
- Basically the idea is to rip apart the reflector and the LED/tube portions of an LCD and just use the glass. The glass without the backlight works as a slide, in front of which there is a lens for magnification and a powerful light for illuminating the slide.
- LCD: After multiple trials, breaking different LCDs, found an old mobile a Videocon V1293 which has a resolution of 128x128 in 1.44 inches and comes with a 3GP player. Managed to remove the casing without damaging the glass. As seen in the LCD pic, the white plastic casing is the rear part of the LCD housing and a portion of the reflector can still be seen.
- Lens:
- Tried various lens from local shops, but reasonable quality lens are available from scientific equipment shops. Vasa Scientific in Malleshwaram has some choices. Got a 75mm dia 25cm FL, 50mm 10cm FL & 50mm 5 cm FL lens. Current projector uses the 50mm/10cm FL. Cost under 100 INR.
- A fresnel lens is necessary to collimate the rays from the light source. It makes sure a point light source becomes wider and uniform. They are available at stationery shops. But one has to ask for page magnifiers that look like a scale, else the usual answer is a shake of the head. Depending on the size, for a 10 inch by 3 inch, the cost is around 45 INR. This lens has not been used cos the LEDs came with focus lenses.
- Light Source:
- Metal Hallide bulbs are usually used for projector and they get hot.
- The idea here was to use LEDs. Illumination did not have to be great so as to be visible in day time. Vision in a dark setup was ok.
- Got 3W high power LEDs from Om Electronics in SP Road along with an LED driver. One has to be careful here as they get very hot and the heat has to be dissipated. The 3W LEDs are from ProLight and roughly around 200 lumens/LED.
- Many ways of heat dissipation were considered:
- TO get a computer processor heat sink, apply thermal compound and paste these LEDs and then drill them down to the heat sink. This was all too much work and there were no tools to do the same.
- Luckily got a LED focus light with 3x1W LEDs and a driver and the enclosure at a local light shop for 200INR. Initial trials were done with 3x1W illumination and then finally desoldered these LEDs and changed them to 3x3W LEDs with the other LED driver. The enclosure comes with its own lenses that narrow down the light. After desoldering had to apply thermal compound to make the new LEDs connect to the LED heat base. Even though the area for dissipitating heat is smaller the heat sink gets slightly hot. Plan is to add a computer fan to cool it further.
- Assembly
- Cardboard was used to make the projector assembly. Could try with plastic, etc at a later point in time.
- Content conversion
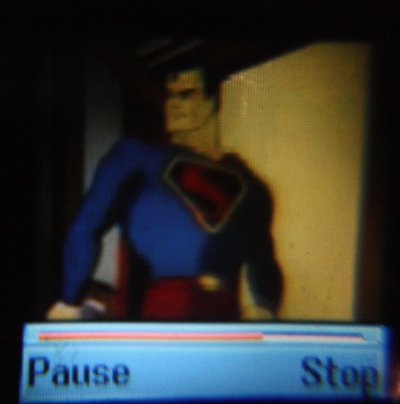
- Used ffmpeg to convert movies to 3GP format to play on the mobile. The 3GP player looses audio sync very often. A few samples from the Super cartoon series and Family guy are shown.
- Magnification
- The image was roughly 1.5 feet for a distance of about 7 feet.


Saturday, June 16, 2012
Simple Low Cost Quick Medical Prescription System

- There was a need to simplify and quicken the process of prescribing medicines for a not-so computer-aware medical practitioner.
- Many alternatives were considered: low-cost android tablets, laptops, etc.
- A small x86 device like a Thinclient was sufficient to do the job. Luckily found a guy selling thinclients on Olx here in India. Got a HP t5135, this can be mounted behind the monitor.
- A Doctor can enter the name of the patient, age, weight and choose to add drugs, dosages & diagnoses. There was no requirement to store the patient records for follow up.
- All operation of this System is done by means of the Numeric keypad and the Function keys. The Function keys are color coded further to enable easy identification and choice of keys.
- It allows a doctor to add or delete drugs, dosages and diagnosis.
- It interfaces to a dot matrix printer and can print the prescription.
- This allows fast prescription, similar in principle to the vast quick bill printing device used by the pay & eat hotels here.
- The price is used 100$ with a 17" monitor and a thinclient.
- The UI is also color coded to ease identification with key.
- Crux 2.7 distrib Crux was customized to boot the Thinclient which has 100MB RAM and boots off USB. Crux is a very fast Linux distribution and easily customisable.
- Extlinux was used to boot the USB stick. It uses a extlinux.conf file. Created thus:
- default /boot/kernl initrd="some initrd" vga=0x317 quiet
- display splash.txt
- The VGA mode is used to enable frame-buffer so that a splash image can be used at boot. The way to create a config file for extlinux
- Octal value ie 030 followed by name of file
- Create by using echo -e "\030imagefile" > splash.txt
- The image file has to be of the type lss16
- How to create the splash image
- With gimp, create a 640x480 pixel file with indexed colors of upto 256 colors.
- Save this as a ppm file.
- use ppmtolss16 < orig.ppm > orig.lss16 to create the lss16 image file.
- Include this name as the file for extlinux to search for in splash.txt
- Install extlinux to the usb disk by extlinux -i /mount_point_of_usb
- No modules were used to boot the Linux kernel. All functionality was built statically into the kernel.
- Unnecessary services like the network, crond were disabled.
- The machine boots in roughly 15 secs.
HP T5135 ThinClient Standard Image Upgrade
- HP T5135 is a thinclient (TC) which can run remote desktop environments that follow the ICA (Citrix) or RDP protocol.
- It is a 100 MB RAM, 64MB flash x86 architecture computer running a VIA processor at 400 MHz. Has 8 USB 2.0 slots (2 housed inside the casing for security) and comes with a VGA port supporting 1600x1200 resolution, a serial port, parallel port, 10/100Mbps LAN, PS2 mouse and keyboard and a 12V connector in a very small form factor.
- Found a local agent who was selling them for affordable prices.
- It came with a standard registered ICA client and the need was to use this TC in a more generic way.
- Found a generic HP image at the HP site: Thinconnect image download
- On extracting this image, this tries to run a flash upgrade utility in the FreeDOS environment via USB.
- For some reason, FreeDOS that was installed by the HP tool was not able to come up. A 4GB pendrive was being used.
- Downloaded the image from this site: Bootdisk
- Follow the instructions:
- Basically a single active partition needs to reside on the USB stick.
- Format the usb stick, eject and re-insert.
- Extract the bootdisk tarball and use the command window and do the following:
- xcopy usb-root\* Name_of_your_usb_drive:\ /E/H/I
- syslinux\syslinux.exe -fma Name_of_your_usb_drive:
- Copy the Flash.dd & the ibr from the Deployment filefolder into the USB drive.
- Insert the USB drive into the TC and reboot.
- Once Freedos starts type in this: ibr flash.dd hd1
- This will install the firmware.
The following steps are for flashing the firmware in Linux :
- Used a Debian USB boot disk that was created using unetbootin and booted into Linux on the TC.
- Without installing the OS, 64MB flash image is where the ThinConnect HP image is loaded. Used the dd command to back up the 64MB flash in case the other upgrade was not successful. Linux identified this flash partition as the /dev/sda partition. So one can back up the image by dd if=/dev/sda of=64Mb-part.img
- On the extracted files on the USB disk was this file FLASH.DD. Turns out that this is the dd image that has to be written to the flash
- Flashed this file to the TC flash by doing this dd if=Flash.dd of=/dev/sda
- Rebooted the TC and it showed the default image with both ICA & RDP support.
- Enabled RDP on a winxp machine and was able to view the remote xp desktop on the TC.
Friday, April 8, 2011
Digital Photo Frame based on TinyCore

- Long time requirement to have a DPF of my own.
- Requirement:
- Reasonably big in size 14 inch or beyond, not like the bad resolution DPFs for lesser cost or the higher resolution ones where one has to sell his/her soul.
- Try and reuse older hardware that I can get as freebie or throw away.
- Got an Emcore i511 board, pentium class SBC (single board computer) with 256 MB CF, 64MB RAM and VGA with 1024x768 resolution. Also got a 14 inch complimentary frame. The SBC runs on 5V DC and consumes about 5-10Watts.
- Wanted to run LFS, but compilation and trials would take too much time.
- Found Tinycore. Runs of very low resource machines, including a 486 and Xwindows.
- Used unetbootin to write the tinycore.iso to the Compact Flash
- Basically uses a new kernel and a ramdisk to run the whole OS. Everything is run from RAM. Harddisk installs are also supported.
- After booting followed the howto from the Tinycore site and created a few native Linux partitions on the same CF and copied the kernel and the tinycore ramdisk. Installed grub by making the required changes. Grub boots the machine.
- Applications can be chosen via the applications manager. Using qiv as an image viewer because of the low resource requirements.
- Installed dropbear via a similar method.
- Tried to auto mount my USB stick that contained all the pics by various methods.
- Making entries in tc-config. But this is not useful for programs that have to wait for X.
- Made changes in /home/tc/.X.d and added scripts to run the qiv imageviewer and to point dropbear to a well-known place for the keys. These scripts are run after X starts.
- The Backup option has to be selected via the X menu for reboot/shutdown else the changes to the default user's home directory /home/tc will not be visible on the next boot.
- Changes can be made in the default initramdisk by extracting the original one by cpio -i -H newc < inputfile.cpio and after extracting make the needed changes and run find directory | cpio -o -H newc > outputfile.cpio. Gzip it and point this to the kernel's initrd.
- Until a better image is found, this is how the DPF looks.
Subscribe to:
Posts (Atom)