- New Blog that is being updated is Tinker Niche
- It's here 👉 Tinker Niche: New Blog/New Stuff
Monday, August 8, 2022
Tinker Niche: The New Blog

Sunday, November 24, 2013
Funbook P300 support for Windows 8
- Install the default adt bundle from Google
- It includes the default Google adb drivers
- Device manager recognizes the P300 as an Android device but does not update the driver
- Either edit the default Google usb driver or download it and edit it.
- To recognize the Funbook, the PID:VID combination needs to be added to the android_winusb.inf file. An example configuration:
- %SingleAdbInterface% = USB_Install, USB\VID_18D1&PID_4E11
%CompositeAdbInterface% = USB_Install, USB\VID_18D1&PID_4E12&MI_01 - Can be changed to
- %SingleAdbInterface% = USB_Install, USB\VID_18D1&PID_0003
%CompositeAdbInterface% = USB_Install, USB\VID_18D1&PID_0003&MI_01 - Notice the VID:PID changed to 18d1 and 0003. This will enable WIN8 to install the driver.
- Now the USB driver for the Funbook P300 is recognised, but Win8 will not install it as it is not signed. So Windows 8 driver signing has to be disabled as given here
- Once this is done Win8 will install the driver
- Android application development IDE will now recognize and install the application on the device.
- This method should work for any of the lesser known Android tabs having a PID of 18D1.
Monday, April 15, 2013
Custom Android ROM: Running Cyanogenmod 10 (JellyBean) on a Micromax Funbook(P300)
- Long time requirement to run a custom ROM on the funbook
- The funbook is rooted so no issue in upgrading stuff.
- To upgrade the image, one can use ClockWorkMod (CWM)
- Used version cwm_recovery_6.0.1.2_a10.zip
- This recovery CWM also disables requirement of a signature
- To install this on the funbook
- Unzip the file.
- Contents are these file install_recovery.sh, reboot-recovery.sh & recovery.img
- Install recovery file, copies the rescue.img to the rescue partition nandg
- Uses cat to write to the partition. dd would be better.
- Reboot-recovery, writes a string boot-recovery to the nandf partition.
- If one is stuck in this mode, where it refuses to get out of recovery mode because of this tag, one can just write a sequence of zeroes on the nandf partition and clear it and the machine will reboot normally.
- Tried various unofficial Cyanogenmod ROMS.
- Tried CM9 ie Icecream Sandwich ROM from Cyanogennmod site cm9_nightly_20120903.zip
- Need to install some compatibility modules, else touchscreen etc does not work.
- Development for CM9 did not seem very active.
- So tried the CM10.
- Follow steps from this site: http://www.slatedroid.com/topic/39064-building-cm10-for-a10-devices/.
- Download the CM10 sources from the cyanogenmod git.
- Make changes to CM10 sources to the point to Shaun2029's repository and save the file in the local_manifest directory.
- Extract the prebuilts from the Funbook and store for later use.
- run these following commands to create a ROM from CM10 directory
- source build/envsetup.sh
- Setup the environment including the toolchains etc
- lunch cm_907-userdebug
- Configure the build for the specific device.
- mka
- Generate the images
- mka otapackage
- Package them so that they can be written
- Download the kernel as noted.
- One has to enable the Assume Hacked memory A10 config option
- One has to disable DEBUG_INFO else the modules will grow too big to fit into the system partition
- The compilation of CM10 failed once and was solved by running this command
- make update-api
- The ROM is created in the out directory.
- Reboot into recovery and then install the zip from the SDcard via CWM.
- JellyBean needs a bigger system directory. Earlier install of CM9 had shrunk the default Micromax funbook /system directory from 500MB to some 265 MB.
- One also needs to install google apps(gapps) for the official supported apps like talk, playstore ,etc. This is installed via CWM in recovery mode.
- But because of the "almost full" nature of the system partition, even though CWM reported successful writing, there was not enough space to write the gapps. And google playstore would crash frequently.
- Solution is to create a bigger system partition. But this Flash file partitioning is done by the image through Livesuite.
- Idea was to get a default Momo9 image. The Funbook is a Momo9 clone from Ployer.
- Tried various 97F1 based ROMs. But all of them had very little space for the /system.
- This site talks about various options http://tabletrepublic.com/forum/iview-760tpc-ployer-momo9/iview-760tpc-k-ployer-momo9-firmware-rom-releases-1610.html. But Iview seems to have changed their webpage layout, so some of the links do not work.
- Finally an IVIEW 760TPC image from here http://www.iviewus.com/newsRead.php?id=87&catId=257 gave a 760TPC.rar which when installed via CWM gave a /system of about 300MB.
- Flashing the Gapps, even inspite of lack of "some" space, applications like playstore are working.


Wednesday, June 20, 2012
Experiments with Tiny LCD projection
 |
| Mobile phone LCD |
 |
| LED Focus Light with Driver |
 |
| Cardboard Lens Housing |
- Since a long time wanted to build a small projector like the ones on instructables.com. It seemed tougher than it actually is.
- Basically the idea is to rip apart the reflector and the LED/tube portions of an LCD and just use the glass. The glass without the backlight works as a slide, in front of which there is a lens for magnification and a powerful light for illuminating the slide.
- LCD: After multiple trials, breaking different LCDs, found an old mobile a Videocon V1293 which has a resolution of 128x128 in 1.44 inches and comes with a 3GP player. Managed to remove the casing without damaging the glass. As seen in the LCD pic, the white plastic casing is the rear part of the LCD housing and a portion of the reflector can still be seen.
- Lens:
- Tried various lens from local shops, but reasonable quality lens are available from scientific equipment shops. Vasa Scientific in Malleshwaram has some choices. Got a 75mm dia 25cm FL, 50mm 10cm FL & 50mm 5 cm FL lens. Current projector uses the 50mm/10cm FL. Cost under 100 INR.
- A fresnel lens is necessary to collimate the rays from the light source. It makes sure a point light source becomes wider and uniform. They are available at stationery shops. But one has to ask for page magnifiers that look like a scale, else the usual answer is a shake of the head. Depending on the size, for a 10 inch by 3 inch, the cost is around 45 INR. This lens has not been used cos the LEDs came with focus lenses.
- Light Source:
- Metal Hallide bulbs are usually used for projector and they get hot.
- The idea here was to use LEDs. Illumination did not have to be great so as to be visible in day time. Vision in a dark setup was ok.
- Got 3W high power LEDs from Om Electronics in SP Road along with an LED driver. One has to be careful here as they get very hot and the heat has to be dissipated. The 3W LEDs are from ProLight and roughly around 200 lumens/LED.
- Many ways of heat dissipation were considered:
- TO get a computer processor heat sink, apply thermal compound and paste these LEDs and then drill them down to the heat sink. This was all too much work and there were no tools to do the same.
- Luckily got a LED focus light with 3x1W LEDs and a driver and the enclosure at a local light shop for 200INR. Initial trials were done with 3x1W illumination and then finally desoldered these LEDs and changed them to 3x3W LEDs with the other LED driver. The enclosure comes with its own lenses that narrow down the light. After desoldering had to apply thermal compound to make the new LEDs connect to the LED heat base. Even though the area for dissipitating heat is smaller the heat sink gets slightly hot. Plan is to add a computer fan to cool it further.
- Assembly
- Cardboard was used to make the projector assembly. Could try with plastic, etc at a later point in time.
- Content conversion
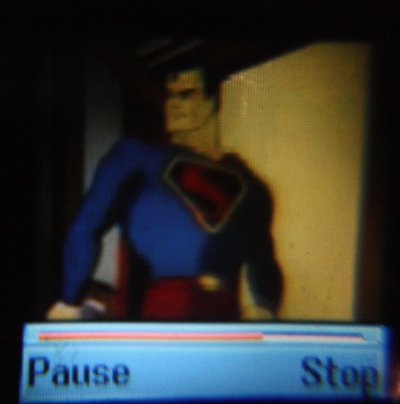
- Used ffmpeg to convert movies to 3GP format to play on the mobile. The 3GP player looses audio sync very often. A few samples from the Super cartoon series and Family guy are shown.
- Magnification
- The image was roughly 1.5 feet for a distance of about 7 feet.



Saturday, June 16, 2012
Simple Low Cost Quick Medical Prescription System

- There was a need to simplify and quicken the process of prescribing medicines for a not-so computer-aware medical practitioner.
- Many alternatives were considered: low-cost android tablets, laptops, etc.
- A small x86 device like a Thinclient was sufficient to do the job. Luckily found a guy selling thinclients on Olx here in India. Got a HP t5135, this can be mounted behind the monitor.
- A Doctor can enter the name of the patient, age, weight and choose to add drugs, dosages & diagnoses. There was no requirement to store the patient records for follow up.
- All operation of this System is done by means of the Numeric keypad and the Function keys. The Function keys are color coded further to enable easy identification and choice of keys.
- It allows a doctor to add or delete drugs, dosages and diagnosis.
- It interfaces to a dot matrix printer and can print the prescription.
- This allows fast prescription, similar in principle to the vast quick bill printing device used by the pay & eat hotels here.
- The price is used 100$ with a 17" monitor and a thinclient.
- The UI is also color coded to ease identification with key.
- Crux 2.7 distrib Crux was customized to boot the Thinclient which has 100MB RAM and boots off USB. Crux is a very fast Linux distribution and easily customisable.
- Extlinux was used to boot the USB stick. It uses a extlinux.conf file. Created thus:
- default /boot/kernl initrd="some initrd" vga=0x317 quiet
- display splash.txt
- The VGA mode is used to enable frame-buffer so that a splash image can be used at boot. The way to create a config file for extlinux
- Octal value ie 030 followed by name of file
- Create by using echo -e "\030imagefile" > splash.txt
- The image file has to be of the type lss16
- How to create the splash image
- With gimp, create a 640x480 pixel file with indexed colors of upto 256 colors.
- Save this as a ppm file.
- use ppmtolss16 < orig.ppm > orig.lss16 to create the lss16 image file.
- Include this name as the file for extlinux to search for in splash.txt
- Install extlinux to the usb disk by extlinux -i /mount_point_of_usb
- No modules were used to boot the Linux kernel. All functionality was built statically into the kernel.
- Unnecessary services like the network, crond were disabled.
- The machine boots in roughly 15 secs.
HP T5135 ThinClient Standard Image Upgrade
- HP T5135 is a thinclient (TC) which can run remote desktop environments that follow the ICA (Citrix) or RDP protocol.
- It is a 100 MB RAM, 64MB flash x86 architecture computer running a VIA processor at 400 MHz. Has 8 USB 2.0 slots (2 housed inside the casing for security) and comes with a VGA port supporting 1600x1200 resolution, a serial port, parallel port, 10/100Mbps LAN, PS2 mouse and keyboard and a 12V connector in a very small form factor.
- Found a local agent who was selling them for affordable prices.
- It came with a standard registered ICA client and the need was to use this TC in a more generic way.
- Found a generic HP image at the HP site: Thinconnect image download
- On extracting this image, this tries to run a flash upgrade utility in the FreeDOS environment via USB.
- For some reason, FreeDOS that was installed by the HP tool was not able to come up. A 4GB pendrive was being used.
- Downloaded the image from this site: Bootdisk
- Follow the instructions:
- Basically a single active partition needs to reside on the USB stick.
- Format the usb stick, eject and re-insert.
- Extract the bootdisk tarball and use the command window and do the following:
- xcopy usb-root\* Name_of_your_usb_drive:\ /E/H/I
- syslinux\syslinux.exe -fma Name_of_your_usb_drive:
- Copy the Flash.dd & the ibr from the Deployment filefolder into the USB drive.
- Insert the USB drive into the TC and reboot.
- Once Freedos starts type in this: ibr flash.dd hd1
- This will install the firmware.
The following steps are for flashing the firmware in Linux :
- Used a Debian USB boot disk that was created using unetbootin and booted into Linux on the TC.
- Without installing the OS, 64MB flash image is where the ThinConnect HP image is loaded. Used the dd command to back up the 64MB flash in case the other upgrade was not successful. Linux identified this flash partition as the /dev/sda partition. So one can back up the image by dd if=/dev/sda of=64Mb-part.img
- On the extracted files on the USB disk was this file FLASH.DD. Turns out that this is the dd image that has to be written to the flash
- Flashed this file to the TC flash by doing this dd if=Flash.dd of=/dev/sda
- Rebooted the TC and it showed the default image with both ICA & RDP support.
- Enabled RDP on a winxp machine and was able to view the remote xp desktop on the TC.
Friday, April 8, 2011
Digital Photo Frame based on TinyCore

- Long time requirement to have a DPF of my own.
- Requirement:
- Reasonably big in size 14 inch or beyond, not like the bad resolution DPFs for lesser cost or the higher resolution ones where one has to sell his/her soul.
- Try and reuse older hardware that I can get as freebie or throw away.
- Got an Emcore i511 board, pentium class SBC (single board computer) with 256 MB CF, 64MB RAM and VGA with 1024x768 resolution. Also got a 14 inch complimentary frame. The SBC runs on 5V DC and consumes about 5-10Watts.
- Wanted to run LFS, but compilation and trials would take too much time.
- Found Tinycore. Runs of very low resource machines, including a 486 and Xwindows.
- Used unetbootin to write the tinycore.iso to the Compact Flash
- Basically uses a new kernel and a ramdisk to run the whole OS. Everything is run from RAM. Harddisk installs are also supported.
- After booting followed the howto from the Tinycore site and created a few native Linux partitions on the same CF and copied the kernel and the tinycore ramdisk. Installed grub by making the required changes. Grub boots the machine.
- Applications can be chosen via the applications manager. Using qiv as an image viewer because of the low resource requirements.
- Installed dropbear via a similar method.
- Tried to auto mount my USB stick that contained all the pics by various methods.
- Making entries in tc-config. But this is not useful for programs that have to wait for X.
- Made changes in /home/tc/.X.d and added scripts to run the qiv imageviewer and to point dropbear to a well-known place for the keys. These scripts are run after X starts.
- The Backup option has to be selected via the X menu for reboot/shutdown else the changes to the default user's home directory /home/tc will not be visible on the next boot.
- Changes can be made in the default initramdisk by extracting the original one by cpio -i -H newc < inputfile.cpio and after extracting make the needed changes and run find directory | cpio -o -H newc > outputfile.cpio. Gzip it and point this to the kernel's initrd.
- Until a better image is found, this is how the DPF looks.
Thursday, April 7, 2011
Linux kernel 2.6.37.2 on a UTU2440-S
- S3C2440 clone board from youtiyou. Basically made by YC corporation. Low cost board around 120$ (without LCD) and comes with standard Linux 2.6.2x . Specification available here S3C2440 Board.
- The good part is this board comes with both a USB host and a slave. Requirement was to investigate some USB client devices ie USB HID devices like Keyboard, mouse,etc.
- Linux kernel 2.6.37.2 has updated USB GHID drivers and more stable stuff.
- Porting is usually a big exercise, sometimes involves a couple of months for all drivers, etc.
- Downloaded gcc from CodeSourcery version 4.5.1 (gcc version 4.5.1 Sourcery G++ Lite 2010.09-50)
- Downloaded the latest 37 kernel and tried a make s3c2410_defconfig.
- Setup a tftp server and downloaded the uImage that was generated. The kernel failed to boot saying unknown machine type. Basically the machine type is reported by the bootloader, in this case uboot.
- In
/include/generated/mach-types.h , changed MACH_TYPE_SMDK2410 from 193 to 5244, the type UTU is as defined in the uboot. - Recompiled and copied a few of the init code snippets into linux/arch/arm/mach-s3c2410
- file mach-smdk2410.c: stuff like flash partition information, nand configuration, usb device config, registering the USB gadget platform code (as specified in the USB gadget readme in linux/doc).
- Had to comment out smdk_machine_init which tries to configure flash in an smdk standard way
- Did not put in the ethernet or the lcd parts, as there was no interest in it.
- Used tftp to download the image thus: tftp 30000000 uImage and followed by a bootm.
- And Linux 2.6.37 booted and finally gave up cos it did not find the yaffs2 filesystem support that the utu board has as default. Root is yaffs2 based.
- Used git to clone yaffs2. yaffs2 isnt part of the standard kernel. Used a script called "patch-ker.sh" from the yaffs2 git code to patch the kernel and enabled yaffs2 in the kernel filesystem.
- Recompiled and Linux kernel 2.6.37.2 with rootfs booted and was able to login to the machine and use it for my needs.
- A teeny bit of happiness in under 30 minutes !
Saturday, January 15, 2011
Miscellaneous Software for Nokia 5800 Express Music Phone
N5800Xm Wake-on-LAN software
- MicroWow Here
- Has the ability to send WOL/WOW packet to remote hosts.
- Did not work for unicast addresses on the WLAN.
- Changed this address to broadcast and an ATOM board D410PT wakes up now.
- Wake-on_LAN for S60
- Available for S60 phones.
- Requires Python for S60 mobiles. Downloaded from here
- This did not work for my setup
N5800Xm Python Software for Nokia S60
- Customised python for the platform, provides easy access to the GUI Framework, good documentation and a means to create installable files for the S60 platform.
- All example code worked like a charm, Hello World, 3D Accelerometer, Btsocket.
- Used netcat (nc) to receive and send data between N5800 and a Linux PC.
- Next was integrating the 3D Accelerometer and a socket application.
N5800Xm 3D Accelerometer Value Display on a Linux Host
- Integrating 3D Accelerometer code and Btsocket is a breeze.
- Adding any code in the 3D Acc callback code, like sending packets, did not work (Newbie in python and object oriented technology)
- Btsocket application connects via available Access Points (Wifi) and opens a TCP connection.
- Used netcat and managed to receive 3D Coordinates on a Linux PC.
- For viewing 3D coordinates, a program called mctrack (motion control track) is available here
- Visually displays data from a PS3 device like a DS3 or a PSMOVE or even a WiiMote.
- Had to convert the received 3D values from the N5800Xm to DS3 format.
- This is easy as netcat allows to call a script and convert on the fly.
- Attached is a video of the 3D values via mctrack
- Still need to validate this further
Friday, December 3, 2010
Linksys WRT54GC lost/forgotten username password recovery
- WRT54GC is a compact 802.11g access point (AP)
- A new AP was bought to extend range, but the customer support center refused to give details of the username and password for activating the new AP.
- After a while, restarted the older WRT54GC with the working settings, logged into the web page and ran a backup "settings" option on the host machine. This saves a file on the host machine,as a binary file.
- Ran a hexdump utility, like dd on unix with the ASCII option, and one can clearly see the username and password.
- Maybe this option will work on other routers too. Tried this on an WRT54G and all settings can be seen after using the hexdump utility.
Acer Aspire One 150 battery recognition problem
- Acer Aspire One AOA150-AB (Linpus: Linux version) does not recognize the battery if the machine is not used for a reasonably long time. So no charging of battery, no booting either.
- After rebooting, the battery charge light stays orange for some 5 minutes and then continuously starts blinking orange roughly with a period of 2-3 seconds. Linux does not provide the battery stats, but says the battery is present. This device is used infrequently and this is the second time it has happened.
- Some forums talked about replacing batteries, etc and hinted it might be a BIOS problem.
- Downloaded the bios from this location here.
- Had to create a windows USB boot disk using the instructions from here.
- Extracted the BIOS file into the USB drive and then booted into Windows on the AOA.
- Invoked the Repair Windows option and finally got into Command prompt and ran the Insyde flash tool provided by the Acer site. Upgraded BIOS from 3.5 to 3.10, the version says 3310.
- Booted into Linux and the battery is recognised now and is charged fully. Have to test it again in a bit.
Friday, September 3, 2010
Ubuntu 10.04 preseed: Ubiquity Install button not enabled
- Automated Debian installs are handled via the d-i (Debian Installer) package. Ubuntu OS automation is based on the Debian installer.
- Canonical has a frontend for it in python called Ubiquity.
- Using a preseed file from the Ubuntu Preseed site works (tried a few options) but Ubiquity stops at a window where it gives an Install summary and does not enable the Install or Back button.
- Ubiquity can be run with debug enabled and it is run thus for automatic installation: ubiquity --debug --automatic
- On verifying the logs, it was found that ubiquity too needs an option for the installation to be automatic in the preseed file. Addition of this line solves the problem ubiquity ubiquity/summary note
- There is a bug still about the percentage of the debconf file that is read, it varies and goes up to 400%
- debconf-(s/g)et-selections are helpful in verifying the debconf database. Though it would be good to have something like a debconf-set-only-selection and the rest not configured.
Friday, July 23, 2010
Blogger Stats: Cool stats !
- Got a promo mail frm the blogger team abt Blogger Stats. It was a long standing requirement. Finally got and it and how!
- It shows who accessed my page and how they landed on it, which pages in particular and which locations were they accessed from.
- It gives me amazing feedback as to which information that I put up is relevant and sought after, based on history (day, week, month, etc).
- It still is in the draft stage and can be accessed here http://draft.blogger.com
- Thanks Blogger Team !
Wednesday, July 14, 2010
Win XP on HP Mini 210 1084 TU
- Got HP Mini from a friend. The Spec is here
- It came with FreeDOS and win xp sp2 install apparently had issues.
- Upgraded the OS to win xp sp3 from the Microsoft site.
- Downloaded HP drivers from this site HP Driver download for 210 1084tu.
- Only HP Bluetooth Module driver had some issues as the support team pointed me to the wrong driver. The USB BT module is the following: Vendor_id: 03F0 Prod_id: 2A1D. The correct driver + stack is here. It is 100 MB !!
- The Synaptics touch pad has to be enabled differently. One needs to go to the properties to understand its operation: double click on the left top to enable/disable, etc.
Thursday, July 8, 2010
12 volt Low-Cost Amplifier


- Aim is to build an amplifer for an Autorikshaw. Has to be low cost, music quality doesnt have to be great.
- Availability of Low Cost MP3 SOCs boards like the AX2008, AJT, etc. Looking at extending these SOCs for other things. They have on-board SOC from Appotech, etc, a USB connector, an SD reader, an FM receiver, a Remote and is available as a board for Rs 150 ie 3$ !!
- Can couple it with an amplifier. Got an amplifier for Rs 150 and this works on 12 V and is a dual bridged amplifier with roughly 15 + 15 Watts of power. Audio board mfd by Shan. It has bass and treble controls. Uses a dual SANYO 4440. Had to experiment with the connections: connect the MP3 player to the AMP to the speakers.
- Got the casing and accessories from Pooja electronics frm SP Road. Roughly 150 Rs and cheap speakers for Rs 50 without box.
- Audio quality is ok. The box provides: MP3 playing, FM, AUX INPUT and works on 12 V.
- Had to use a voltage reg: a 7812 and 7805 for the 12v to the amp and 5v to the MP3 player.
- Picture 1 is the almost finished amp and Pic 2 is from an earlier stage.
- Total cost of amp+player around 500-600 Rs.
GPS on a Java enabled phone


- GPS device is a Holux GPSLIM240: Bluetooth based return NEMA 0183
- Phone is a Motorola Ming 1200 having Bluetooth etc.
- A J2ME phone having MIDP 2.0 and CLDC 1.1 or above is needed. CLDC 1.1. supports floating point.
- Used SUN's java development environment on Ubuntu Linux 9.04
- Debugging on a phone is pretty problematic. I did not enable bluetooth via the emulator.
- Used a Bluetooth app provided by Bruce Hopkins for device discovery, etc.
- The App shows speed, the direction of travel, odometer, date and time.
Sunday, March 14, 2010
Enabling Java on the Moto Razr v3
- Installing java on the Razr needs some circus tricks.
- Install Motorola Phone Tools from somewhere. It is officially sold but lucky I had an earlier install.
- All transfers to the device are done via the USB modem and some protocol.
- This page said it all http://gomestic.com/consumer-information/how-to-install-java-games-onto-motorola-v3-phones/
- Have to install Jadmaker first and make a jad from the Jar.
- Have to install midway to transfer file to the phone.
- Java app loader has to be enabled on the phone to first initiate the transfer. The Serial Port is obtained from the Advanced tab of the Device Manager.
- After tx the app is auto installed and run.
- The application runs pretty slowly.
Tuesday, December 8, 2009
Nokia Color LCD parallel port setup
- Nokia color LCD inspiration from this page http://serdisplib.sourceforge.net/ser/nokcol_15g10.html
- Bought a color display at the usual place for 200 INR.
- Ckt similar to the 3310, driven by serial means but requires an additional Led backlight powersource. A variable adaptor set to 6V provided enough backlight to view the LCD.
- The trickiest part is the Nokia LCD connector (receptacle). The form factor is uSOP, pitch is 0.5mm. Wrecked a few by trying to solder it myself. Many alternatives were considered: getting a PCB made (costs quite a bit), importing a prototyping IC adapter such as the Epboard uSOP to DIP adapter about 6$ + shipping, getting some mobile repair people to rig it up. None of them worked and as usual the local repairmen were no good, most of them chose not to do it even if I would pay them handsomely
- Finally asked the GD Guys. Sparkfun calls anybody who can solder 0.5mm a God and I had the privilege of getting one wire soldered by Nagaraj Nagarkar. Special thanks to the GD folks. Wouldnt have been able to do it without you.
- Serdisp did nothing with the S1D15G10 with testserdisp. The assumption was it was a Nokia 6610.
- Decided to try the N3510 driver. The screen came up with a lesser resolution 97x68.
- Recompiled the n3510 driver with 130x130 and the results are below.
- Weird! Need to check this further.


Sunday, November 15, 2009
Nokia 3310 LCD on a parallel port
Laymanspeak: A Nokia 3310 is lowcost, less than 100 INR. So electronics projects requiring displays frequently use them. How to get such a thing working by making a connection off the parallel port is detailed below.
 Serdisp showing digits on LCD
 Serdisp showing Pattern
 Parallel port with USB power
- Nice screens shots of the Nokia 3310 LCD, as an audio player UI, secondary display on the web was the actual motivation.
- Main info taken from these :Open source serial display library support for Nokia 3310 and Thermometer using a Nokia 3310 LCD
- Got 1 from the usual place and its difficult to assemble the LCD once it is opened. The pin headers do not sit back easily.
- Used the power circuitry from the Thermometer site. You do not actually need to use 3 data pins to power the LCD like in that example. And as I had to change serdisp code to switch on a pin in the LPT port, just used a USB connector to get 5V. Chk pic. I used 2 diodes (1N4148) to drop the voltage to around 3.9 - 4V.
- Used the wiring diagram from the Serdisp PCD site. Instead of 1K ohms used 10K. The Vout pin cap is 4.7uF and the capacitor across Vdd is 100uF. This cap seems to give a stable power source and better contrast.
- Circuit construction is pretty simple. Soldering skill might be needed.
- Downloaded the latest serdisp tarball and compiled straight out on the Fed 11 box.
- Connected the circuit and testserdisp was able to bring up the LCD. Pics attached.
- Also downloaded and compiled GraphLcd . This supports displays supported by serdisp. You can draw pics and get fancy fonts on the LCD. showpic, showtext, convpic: These are tools that convert pics and renders stuff on the LCD.
- In case the LCD does not work, check at the Vout pin. Pin 7. If the LCD has been initialised properly this should be around 9 V. If for some reason, communication between PC and LCD is not possible this value will be at a 3-4V range.
- LCD details: 84x48 pixels. mono chrome. Works on a serial interface (SCLK and Serial Data-in). Has a D/C (Data or Active Low Command) mode and a Reset pin. The CS has been permanently grounded as in the serdisp case. To check if this display is ok, a Res has to be issued and then command mode and values of 0x21: to put the LCD in Extended mode and 0xC8 to set the Vop. After this command the Vop actually goes to 9V. Basically gives a clue that the LCD comm is fine.
Serdisp showing digits on LCDSerdisp showing Pattern Parallel port with USB powerFriday, November 13, 2009

Subscribe to:
Posts (Atom)